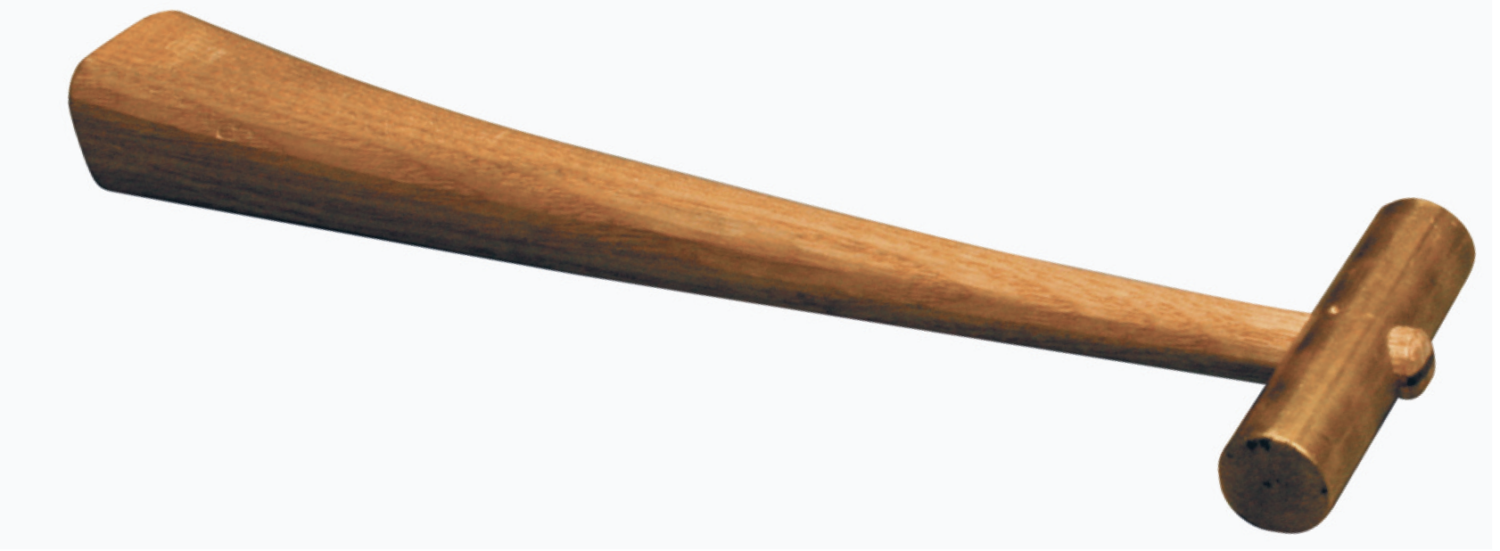
fitz posted: " 4–82. A view of the finished hammer showing the pared, wedged end. The following is excerpted from David Finck's "Making & Mastering Wood Planes." No matter what sort of handplane you use, this book is perhaps the best guide available to understan" Lost Art Press
4–82. A view of the finished hammer showing the pared, wedged end.
The following is excerpted from David Finck's "Making & Mastering Wood Planes." No matter what sort of handplane you use, this book is perhaps the best guide available to understanding, tuning and using these tools at a high level.
Written by a graduate of the College of the Redwoods (now The Krenov School), "Making & Mastering Wood Planes" is ostensibly about the laminated handplanes that James Krenov made famous in the 20th century. But Finck decided to probe far deeper into the topic – so much so that this book is actually an excellent primer on handwork itself.
Use a length of 5/8-inch-diameter brass rod for the head. If ordering through an industrial supply catalog, remember that the minimum length will provide for many hammer heads. Smaller lengths may be found at a hardware store or machine shop. Saw off a segment 2-1/2 inches long, face the ends with a sander, and then round the sharp edges.
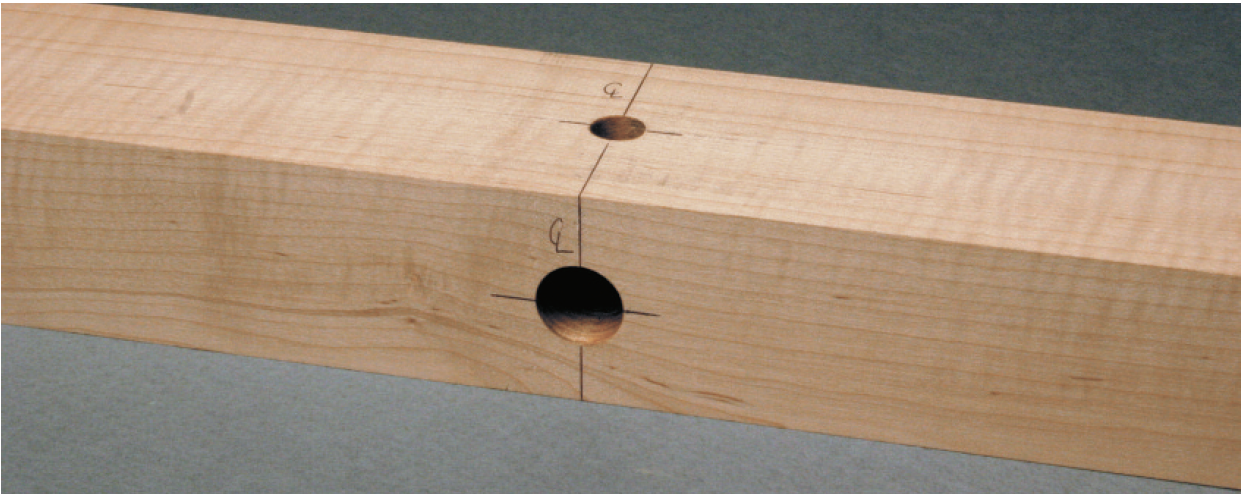
Now the trick is to drill a perfectly centered hole crosswise through the rod. To do this, make a simple fixture from a squared and trued length of hardwood that's approximately 12 inches long x 1-3/4 wide x 1 inch thick. Divide the stick in half with two connected lines on a face and an edge, then mark the center of those lines (4–77). Drill a 5/8-inch hole through the mark on the face. Then insert the brass rod so that the ends protrude from the fixture the same amount. The rod must be a snug fit. If it is too loose, shim it with a wrap of tape.
4–77. Fixture layout for drilling a centered hole in a hammer head (holes already drilled on centers).
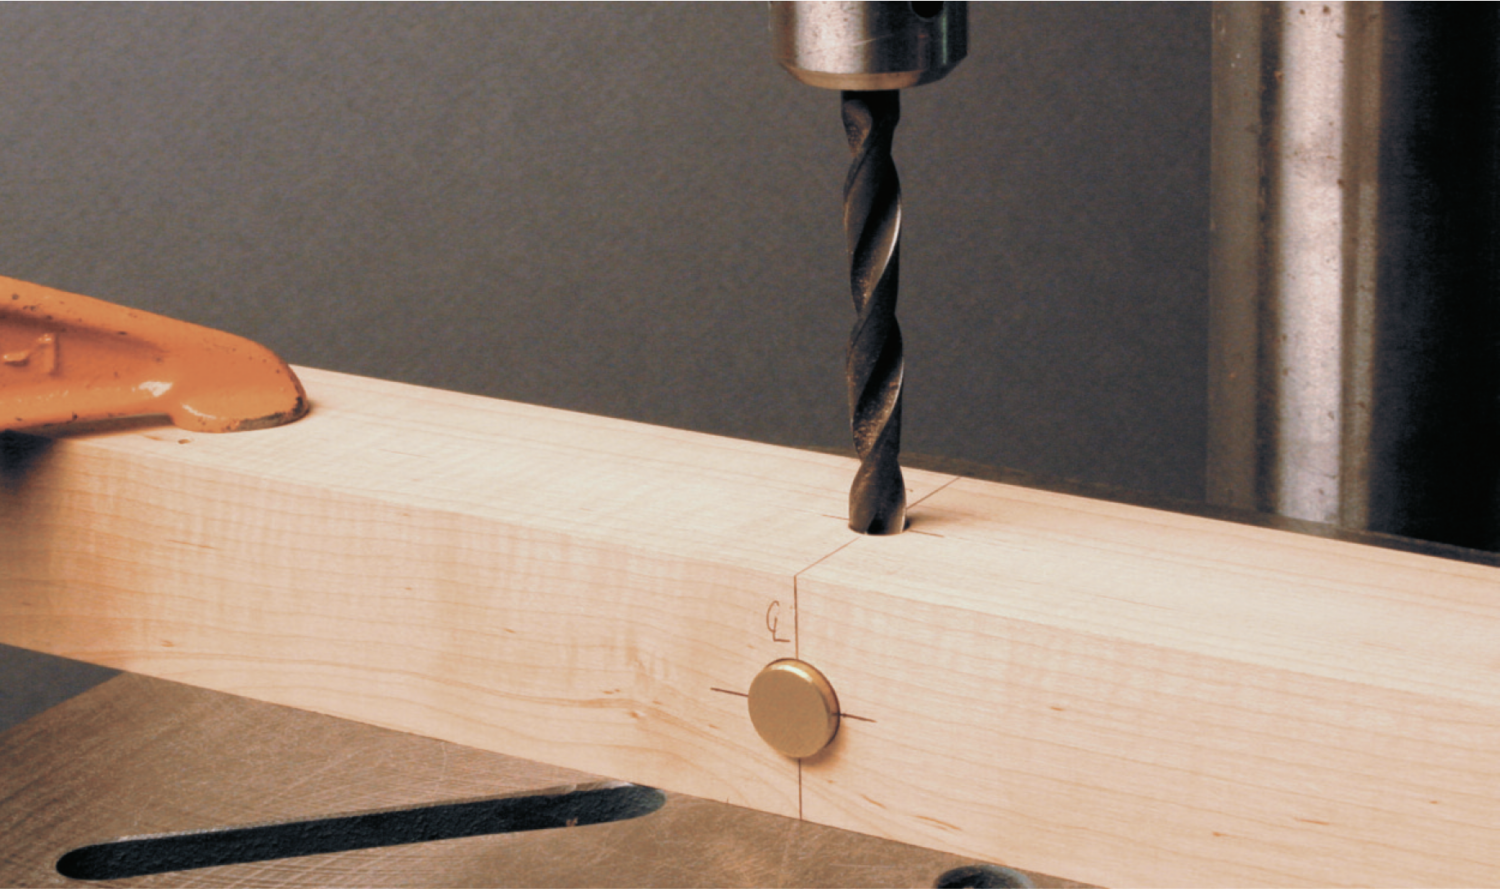
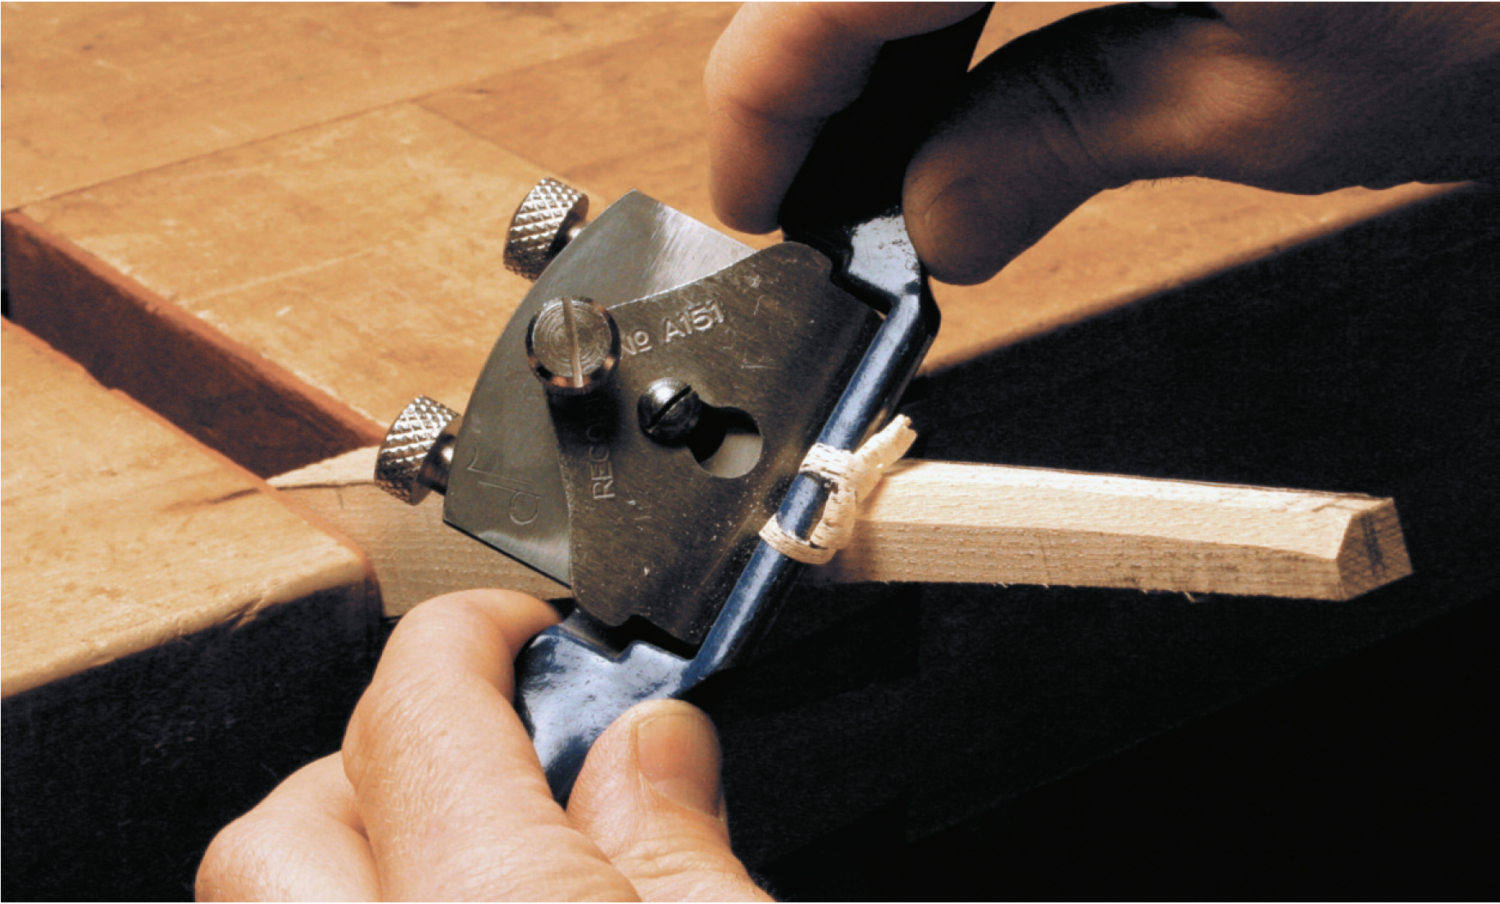
Chuck a 3/8-inch brad-point drill bit in the drill press. Lay the fixture on the drill-press table, edge up, and use the point to perfectly center the bit at the centerpoint on the line. Clamp the fixture securely. Drill down to the rod, but not into it. Replace the bit with a 3/8-inch metal-cutting bit and drill through the rod (4–78).
4–78. Drilling a handle hole into the hammer head.
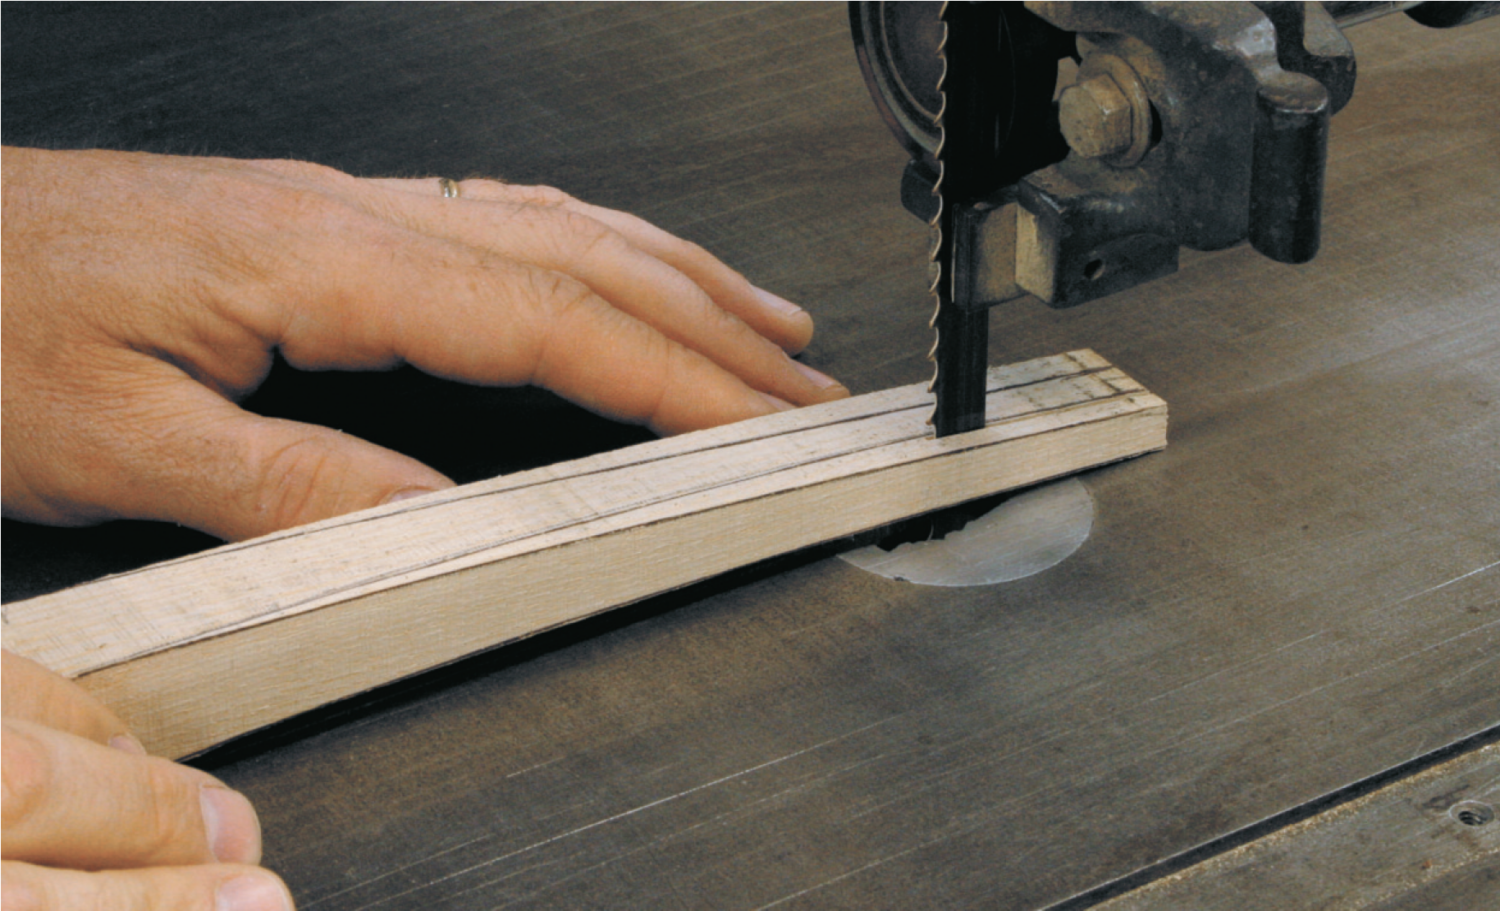
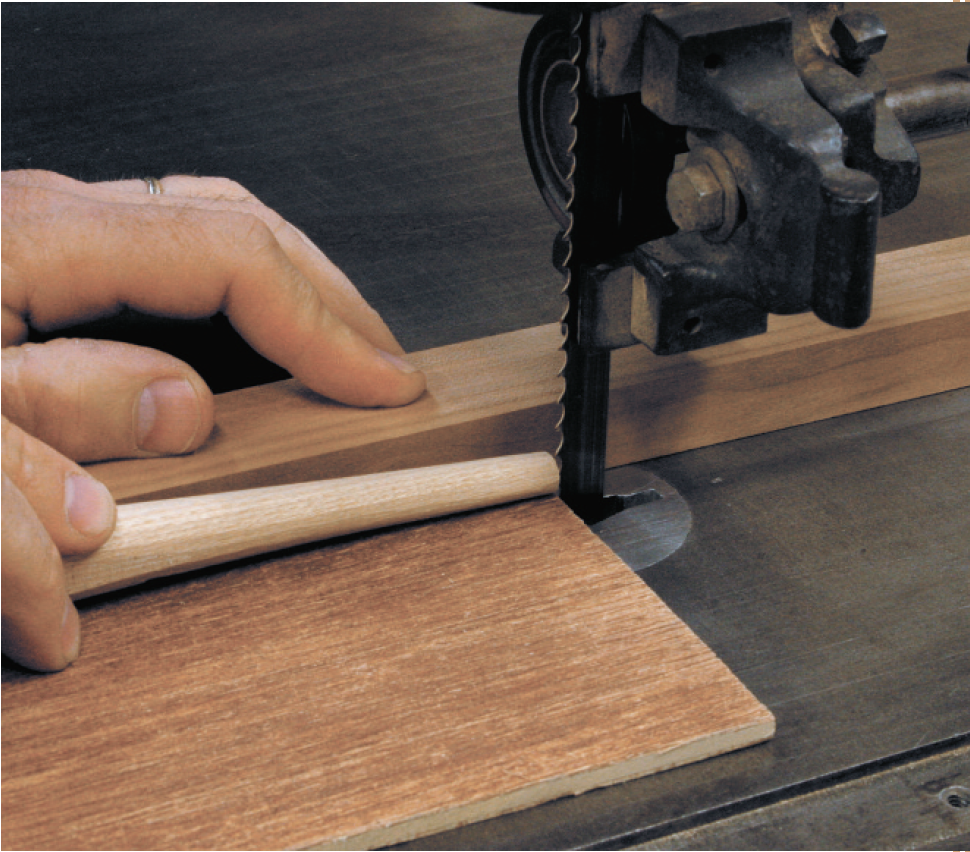
Make a handle from a 12-inch-long x 1-inch-wide x 1-inch-thick stick of tough, springy hardwood such as hickory, ash, or oak. Shape one end to a 3/8-inch-diameter to fit the hammer head. The stick is longer than the handle will be, so the waste end may be clamped in a vise while the handle is worked with a spokeshave. Lay out the shape of the handle on one face; the shape should taper to 3/8 inch at the hammer-head end. Saw out the shape on the band saw, remaining outside the lines. Lay out a second set of lines on the sawn face, again tapering to 3/8 inch at the head end, and saw those as well (4–79). If dealing with gentle curves, place the con-cave surface down, to prevent the stock from rocking, while the second set of lines is being sawn.
4–79. Sawing the handle. The first set of lines are already cut, and the second set are being sawn.
Use a spokeshave to shape the handle (4–80). Form the 3/8-inch-square end of the handle into an octagon and then, with very fine cuts, shape it into a circle. Try the hammer head until it just gets started on the handle. Twist the head back and forth to burnish the handle and you will see exactly where to remove wood to improve the fit. Fit the handle snugly through the head and let it extend about 1/8 inch beyond. Simply trim off any excess if it goes through further. Cut the handle to length and trim up the end.
4–80. Shaping the handle with a spokeshave.
Next, saw a narrow kerf in the thin end of the handle, for wedging the hammer head in place. Saw it in line with, and 1/8 inch shy of, the full diameter of the hammer head. The kerf is visible only at the end when the hammer head is installed. It is difficult to clamp the tapered shape of the handle and make the cut with a handsaw, so use the band saw, running the handle against a straight piece of stock. Close off the throat plate of the band saw by sawing into another piece of wood that will act as a temporary table (4–81).
4–81. Kerfing the handle for a wedge. The scrap below the handle stock serves to close off the wide band-saw throat plate; otherwise, the narrow handle end might drop in and jam.
Now prepare a low-angled wedge from some 3/8-inch-wide stock. The wedge should take up most of the length of the kerf, without bottoming, before it jams. Install the hammer head, squeeze a little glue into the saw kerf, and tap the wedge into place. When the glue has dried, carefully pare the end of the handle and wedge, leaving them both a bit proud of the hammer head (4-82)[top].


No comments:
Post a Comment